Starting with Jupyter
(5 minutes)
This is for Nevis users only
The material on the rest of this page applies to users with an account on the Nevis particle-physics analysis cluster. This includes all the students in the Nevis REU program, no matter which research group you’re in.
If you don’t have an active account on the Nevis particle-physics cluster, then you won’t be able to log in. You’ll have to find another resource that gives you access to Jupyter+ROOT, or install it on your own system, or proceed without it and stick with the command line.
In any web browser (laptop, desktop, tablet), go to
https://notebook.nevis.columbia.edu.1 You’ll be prompted for your
Nevis account name (just the name, no @<server-name>) and
password.
After you login, there’ll be a pause while Jupyter starts up. Eventually you’ll see a display that looks something like this:
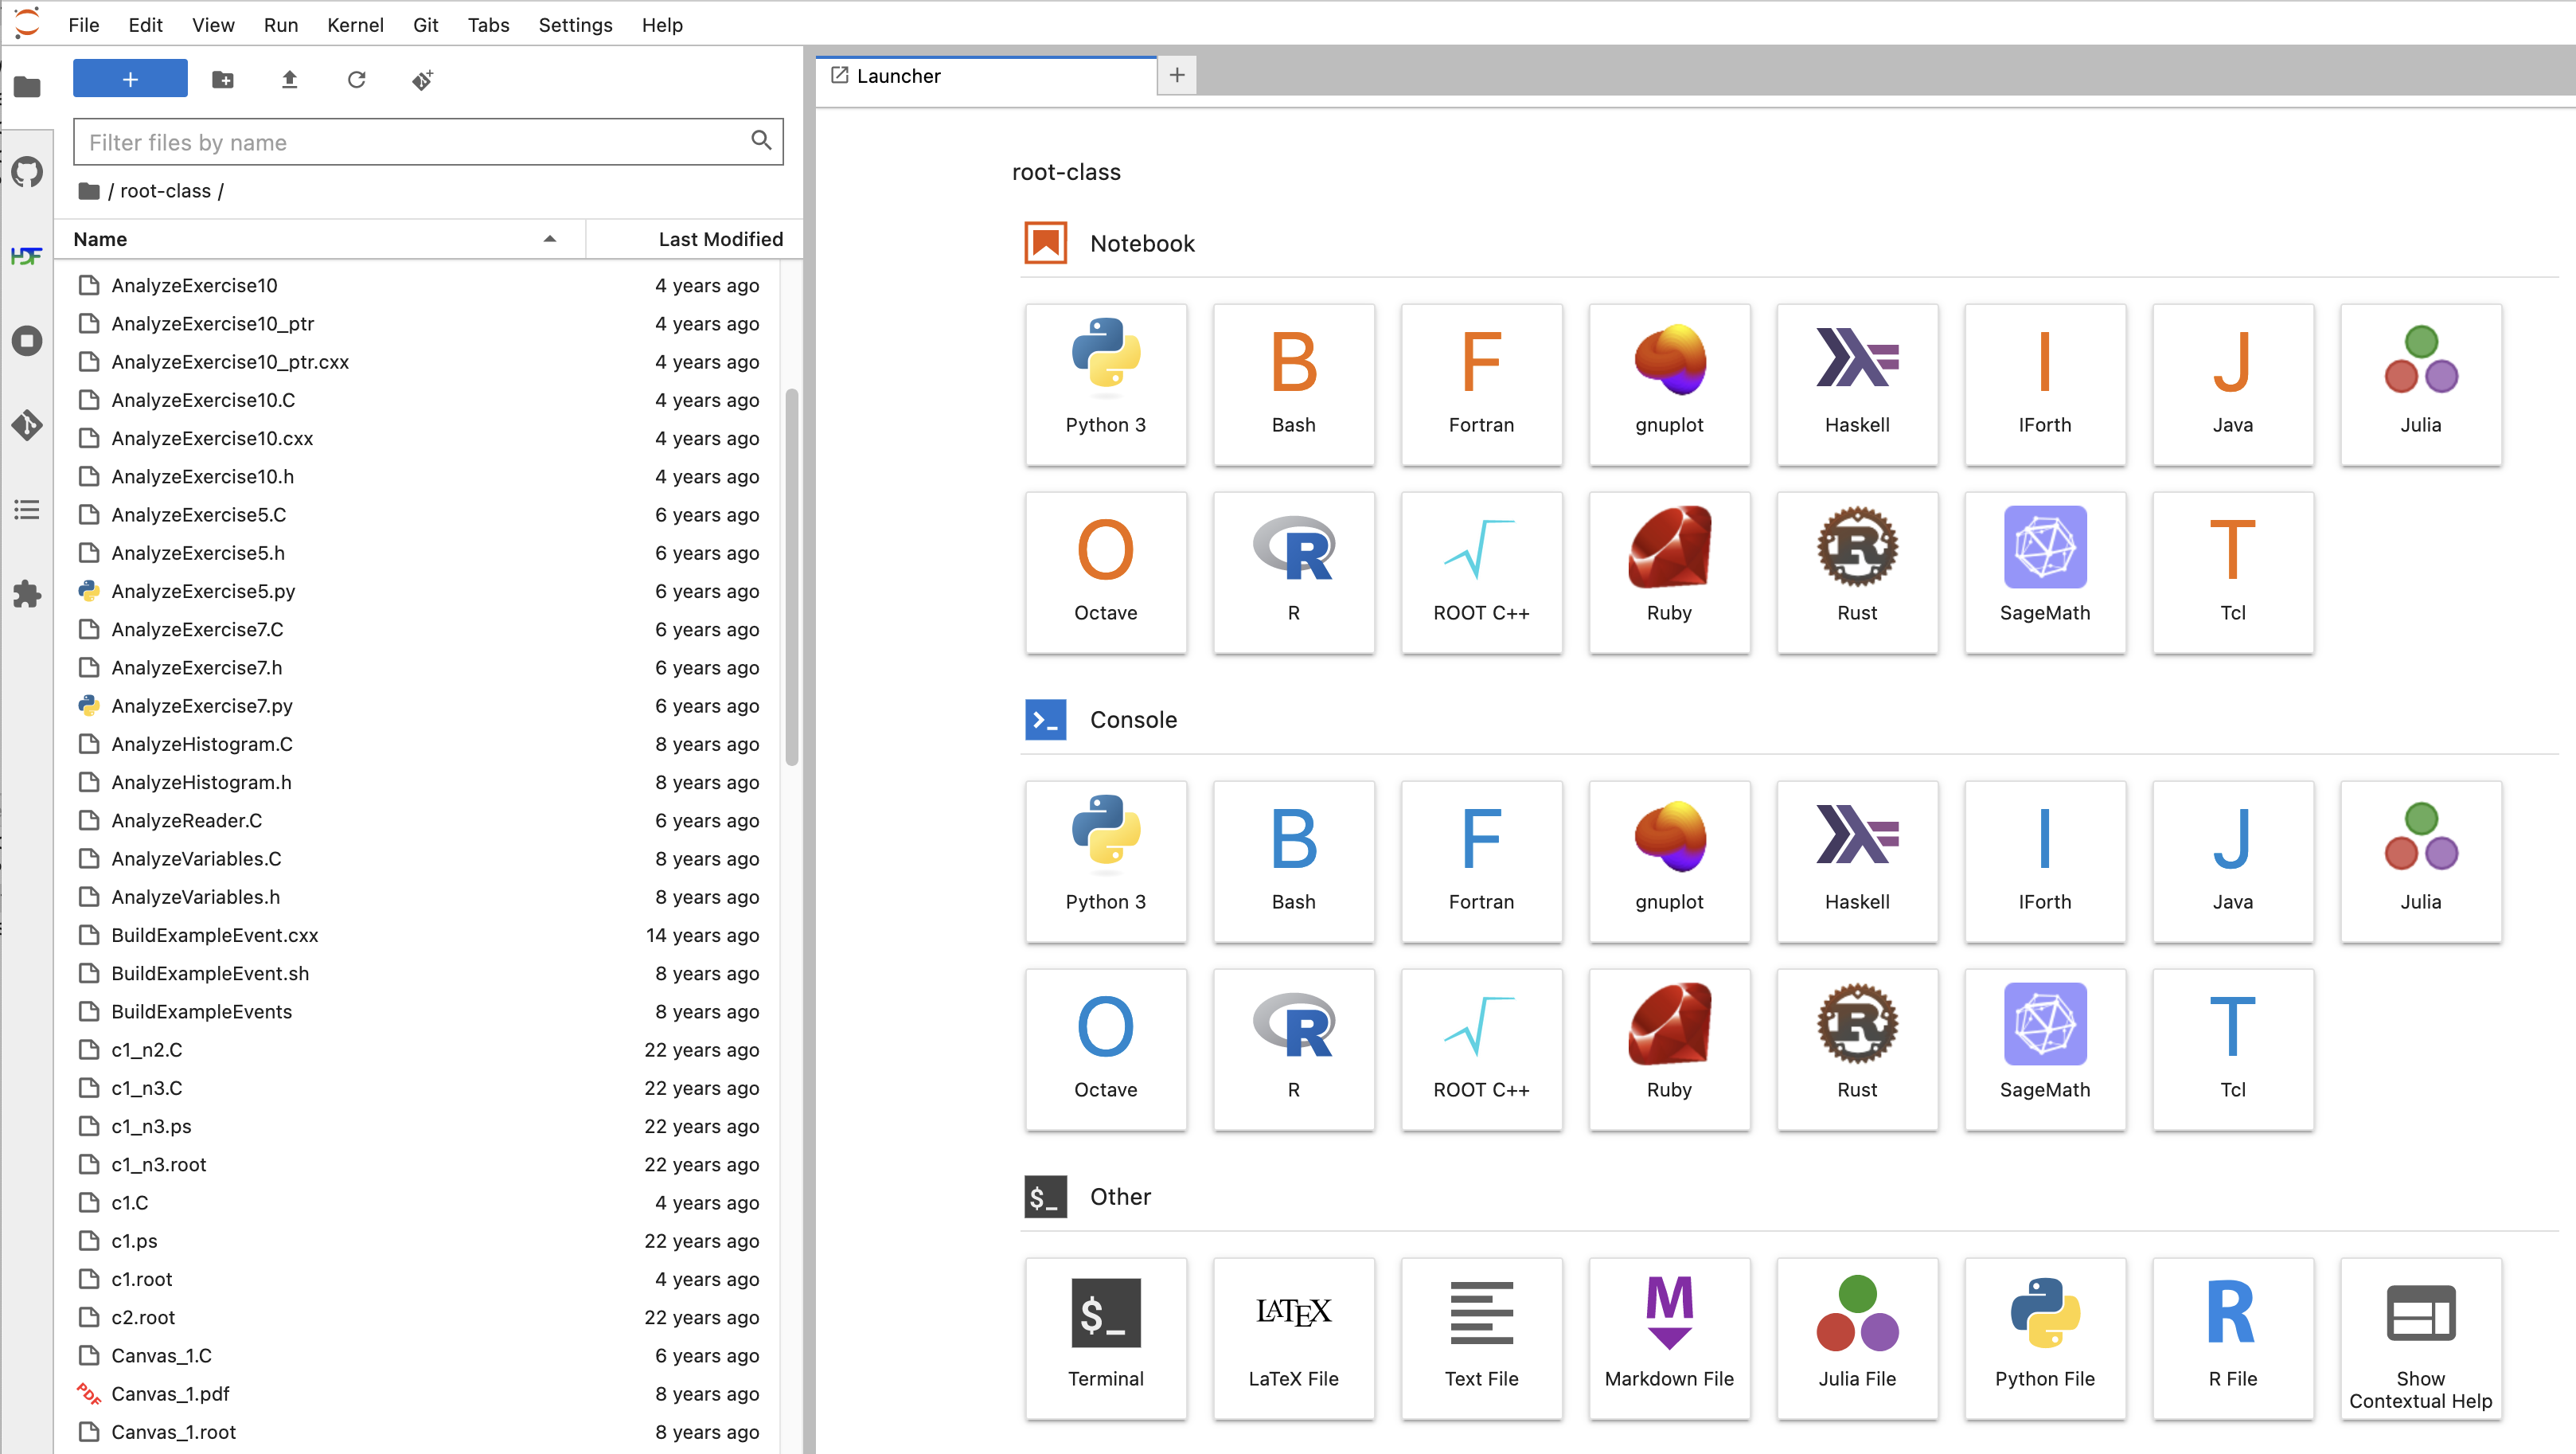
Figure 21: It won’t look exactly like this, for a number of trivial reasons.2
You are looking at JupyterLab, a browser-based method of running programs.
You’ll see your home directory in the left-hand panel. Look at Jupyter’s File menu, and also right-click on one of the filenames in the left-hand panel. This will give you an idea of the elementary file operations you can do directly from Jupyter.
The fun part is the area on the right with all the icons. This is the Launcher. It’s going to “disappear” when get to the next page of this tutorial; if you want to see it again, just click on the + symbol you can see in the top area of the window.
While there’s a lot to see in the Launcher, there are only three icons that will be relevant to this tutorial:

Figure 22: These are the only icons you have to pay attention to for this tutorial. In fact, the Terminal icon at the bottom isn’t all that important either, which is why I’ve circled it in a lighter shade.
For extra added Jupyter goodness, mouse over the icons you’ll see on the top left, to see the hovertext about what they do.
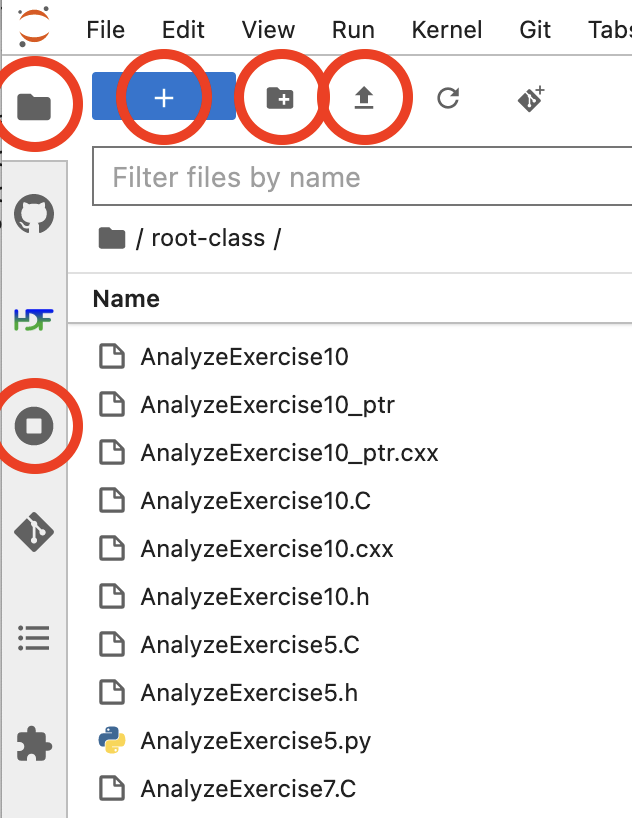
Figure 23: I’ve circled the auxiliary icons that I think might be potentially relevant to this tutorial or the work you’ll do this summer. As your familiarity with Jupyter increases, you’ll find use for the other icons.
Jupyter is intended to provide an IDE (Integrated Development Environment) in a web browser.3 Each one of the Notebook icons is a “kernel,” that is, an environment for interpreting commands. We’ll take a look at one of these kernels in the next section.4

Figure 24: https://xkcd.com/1202/ by Randall Munroe
- 1
Take care: it’s “https”, not just “http”.
- 2
What are those reasons?
The placement of the icons will depend on the size of your screen.
When I made this screenshot, I was visiting my
root-classdirectory. You probably haven’t copied over all those files.If you’re not using the Nevis notebook server, you probably won’t see as many icons. I added some different languages and environments.
Would any of those additional kernels be of any use to you? Probably not. If I’m honest, I’m just showing off; I added them to show I could.
Here’s a few of them, If you’re curious:
If you’re used to Matlab or Mathematica, you might want to take a look at the free equivalent SageMath, which you can see is available on our notebook server.
R is a programming language for statistical computing. It has a large suite of operators for working with arrays and matrices.
Bash is a command and scripting language for UNIX. You’ve already used it in this tutorial. If you’re working on a shell script (e.g., for use with a batch system) then it can be handy to use a notebook to develop it.
- 3
Jupyter can’t do visual programming, that is, creating programs by moving icons around to form diagrams. Or rather, it can’t do that yet; Jupyter is under continual refinement. Who knows what we’ll be able to do next year?
- 4
The icons in the Console and the Other sections are for more advanced work with the notebook kernels. They’re not relevant for this tutorial, but you may want to read more about them if you use Jupyter notebooks for serious programming and debugging.